
Sending your first shipment to Amazon FBA is a clear sequence of steps — but the difference between a cheap, smooth shipment and an expensive, delayed one comes down to a few decisions most guides never mention: how Amazon splits your inventory across fulfillment centers, and whether you pay an inbound placement fee. This guide covers the full process and the placement, box-content, and fee-avoidance details that actually save you money in 2026.
Before you start
Have three things ready: an active FBA listing, the physical inventory on hand, and a laser or thermal printer (inkjet smudges and won't scan). Also decide up front whether you'll send case-packed stock (identical units, same count per box — simpler and cheaper) or individual units (mixed boxes, more handling). This one choice affects your fees later.
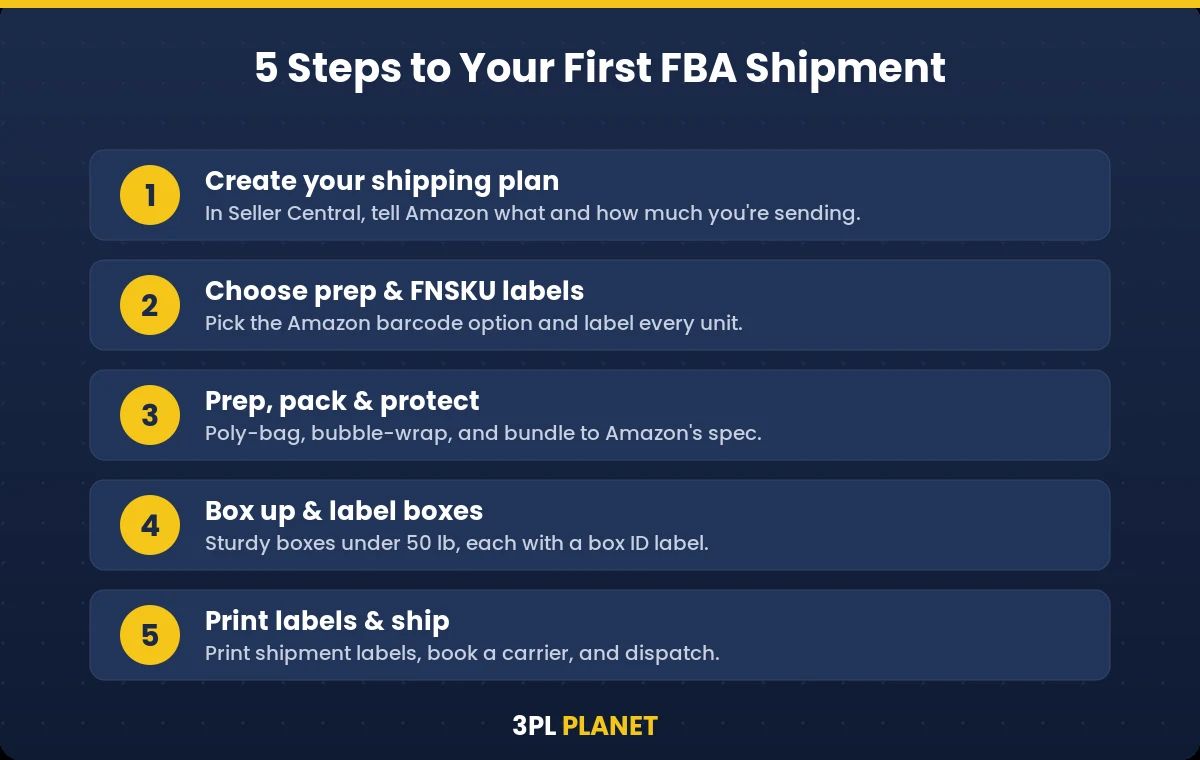
Step 1: Create your shipping plan
In Seller Central, open Manage Inventory → Send/Replenish Inventory. Confirm your ship-from address, pick the product, and enter your quantities. This is where the important decisions begin — because right after this, Amazon shows you your placement options, and that's where sellers quietly overpay.
Step 2: Understand shipment splits & the placement fee
Amazon no longer sends all your inventory to one place. When you create the plan, it offers placement options that trade off convenience against a per-unit inbound placement service fee:
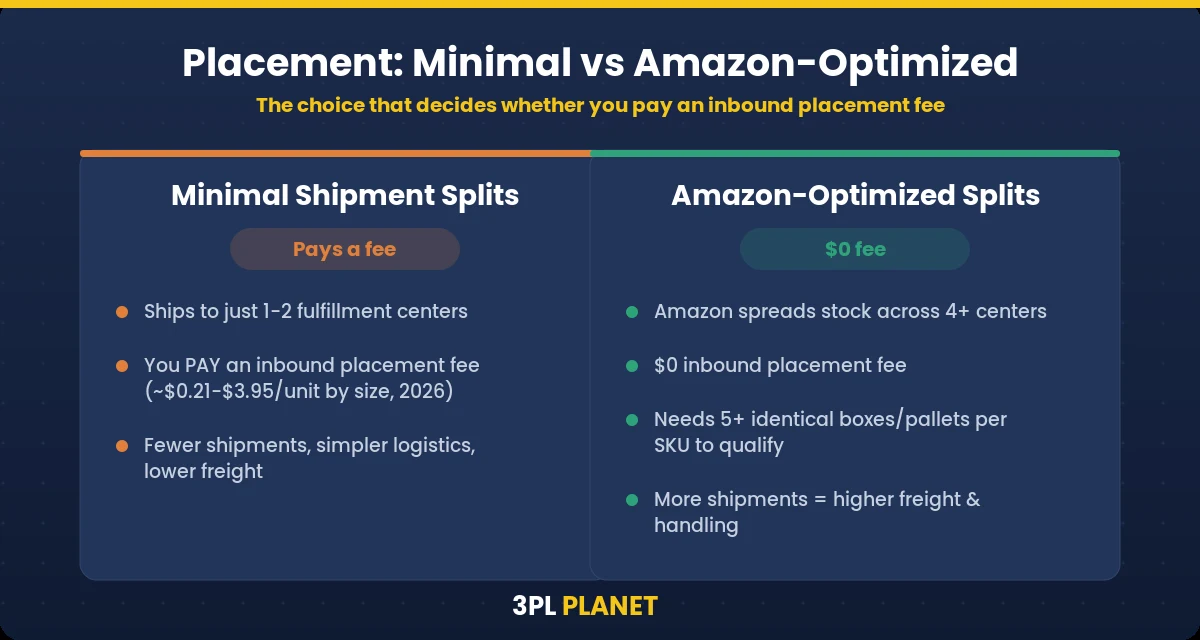
- Minimal shipment splits — Amazon sends your stock to just 1–2 fulfillment centers. Simpler and cheaper on freight, but you pay an inbound placement fee (roughly $0.21–$3.95 per unit depending on size tier in 2026; about $0.30–$0.40/unit for standard-size items).
- Amazon-optimized shipment splits — Amazon spreads your inventory across 4+ centers and waives the placement fee entirely ($0). The catch: you're now creating more shipments to more destinations, so your freight and handling go up.
The right choice is a math problem, not a default: compare the placement fee you'd pay (units × per-unit fee) against the extra freight of shipping to more locations. For small, light, high-value items the placement fee is usually cheaper; for bulky, low-cost items, optimized splits often win.
How to qualify for $0 placement fees
You don't have to just accept the fee. Here's how sellers get inbound placement down to $0:
- Send 5+ identical boxes (or pallets) per SKU. Amazon-optimized placement generally requires at least five identical cartons per item — so consolidating a SKU into fuller, standardized case-packs unlocks the $0 option.
- Use Amazon Warehousing & Distribution (AWD). Inbound to AWD is exempt from placement fees — Amazon auto-distributes your stock to FCs and even waives storage-utilization surcharges. Ideal for bulk/wholesale sellers.
- Ship by pallet (freight). With the post-pack method, shipping 5+ pallets (LTL) can bring placement fees to near $0.
- Join SIPP (Ships in Product Packaging). Eligible products earn a fulfillment discount of about $0.04–$1.32/unit — which can offset or cancel out the placement fee.
Note: Amazon's fees and thresholds change periodically — always confirm the current rates and requirements in Seller Central before you commit a plan.
Step 3: Choose your barcode & prep
Choose the Amazon barcode (FNSKU) option so your inventory is tracked separately, not commingled with other sellers' stock. Confirm the prep each unit needs (poly-bag, bubble wrap, bundling). New to FNSKUs? See our FNSKU guide.
Step 4: Prep, pack, and protect
Apply the FNSKU to every unit (covering any existing barcode), poly-bag loose or soft items with a suffocation warning where required, bubble-wrap anything fragile, and assemble bundles as single labeled units — all to Amazon's current spec. Our prep requirements checklist has the full detail.
Step 5: Box up & provide box content info
Boxing has rules that carry their own hidden fees:
- Sturdy boxes, each under 50 lb (heavier needs a "Team Lift" label; over ~100 lb, "Mechanical Lift").
- Provide box content information — the exact SKUs and quantities in each box — via manual entry, a flat-file upload, or 2D barcodes. Skip this and Amazon charges a manual processing fee per unit.
- Case-packed shipments (identical SKU and count per box) are faster to enter, easier to receive, and help you hit the 5-box threshold for optimized placement.
Step 6: Print labels, book a carrier & ship
Amazon generates a box ID/shipment label for each box (apply it flat and scannable) and a carrier label. For small-parcel, the Amazon Partnered Carrier program usually gives the best rates and integrates tracking automatically. For pallets, arrange LTL freight. Then track everything under Inventory → Manage FBA Shipments until your units are checked in and live.
How a prep center makes all of this cheaper
A good prep center doesn't just label and box — it structures your shipment to minimize fees. We consolidate your SKUs into standardized case-packs (helping you qualify for $0-fee optimized placement), enter accurate box content to avoid manual processing fees, palletize for freight when that's cheaper, and can route bulk inventory through AWD. Combined with an under-1% error rate, that means your first shipment arrives compliant and costs less than doing it alone. Explore our FBA prep service to see what's included.
Let us structure your first FBA shipment to save on fees
Prep from $0.35/unit, same-day dispatch, no setup fees — plus 20% off your first prep.
Get a Free Quote